
How I Made an Earthquake Simulator
I recently found that my friend BECKY STERN’s birthday is one day apart from mine, so we decided to do a gift exchange for our birthday 🎉
I knew she was going to make something super thoughtful (she did) and I wanted to make something that one, she had not made, and two, was 100% personalized to her. Sooooo through research I found that she likes:
Disaster movies
Terrariums
Horses (when she was little she made a horse friend named Sunny)
Sooooooo I made an earthquake simulator in a glass terrarium.
Watch the video if you havent yet :)
INGREDIENTS
MOTOR - DC 1.5V - 3V 7000RPM-14000RPM Vibrating Micro Coreless Brushed Motor
Battery - Lithium Ion Polymer Battery
JST connectors (for battery)
Tiny Switch - SPDT Slide Switch
Mini USB to USB A cable (to charge battery)
Moss, terrarium, horse, and tools found at my local Michaels
The build
I measured the terrarium and based the build around it as the opening was my only restriction.

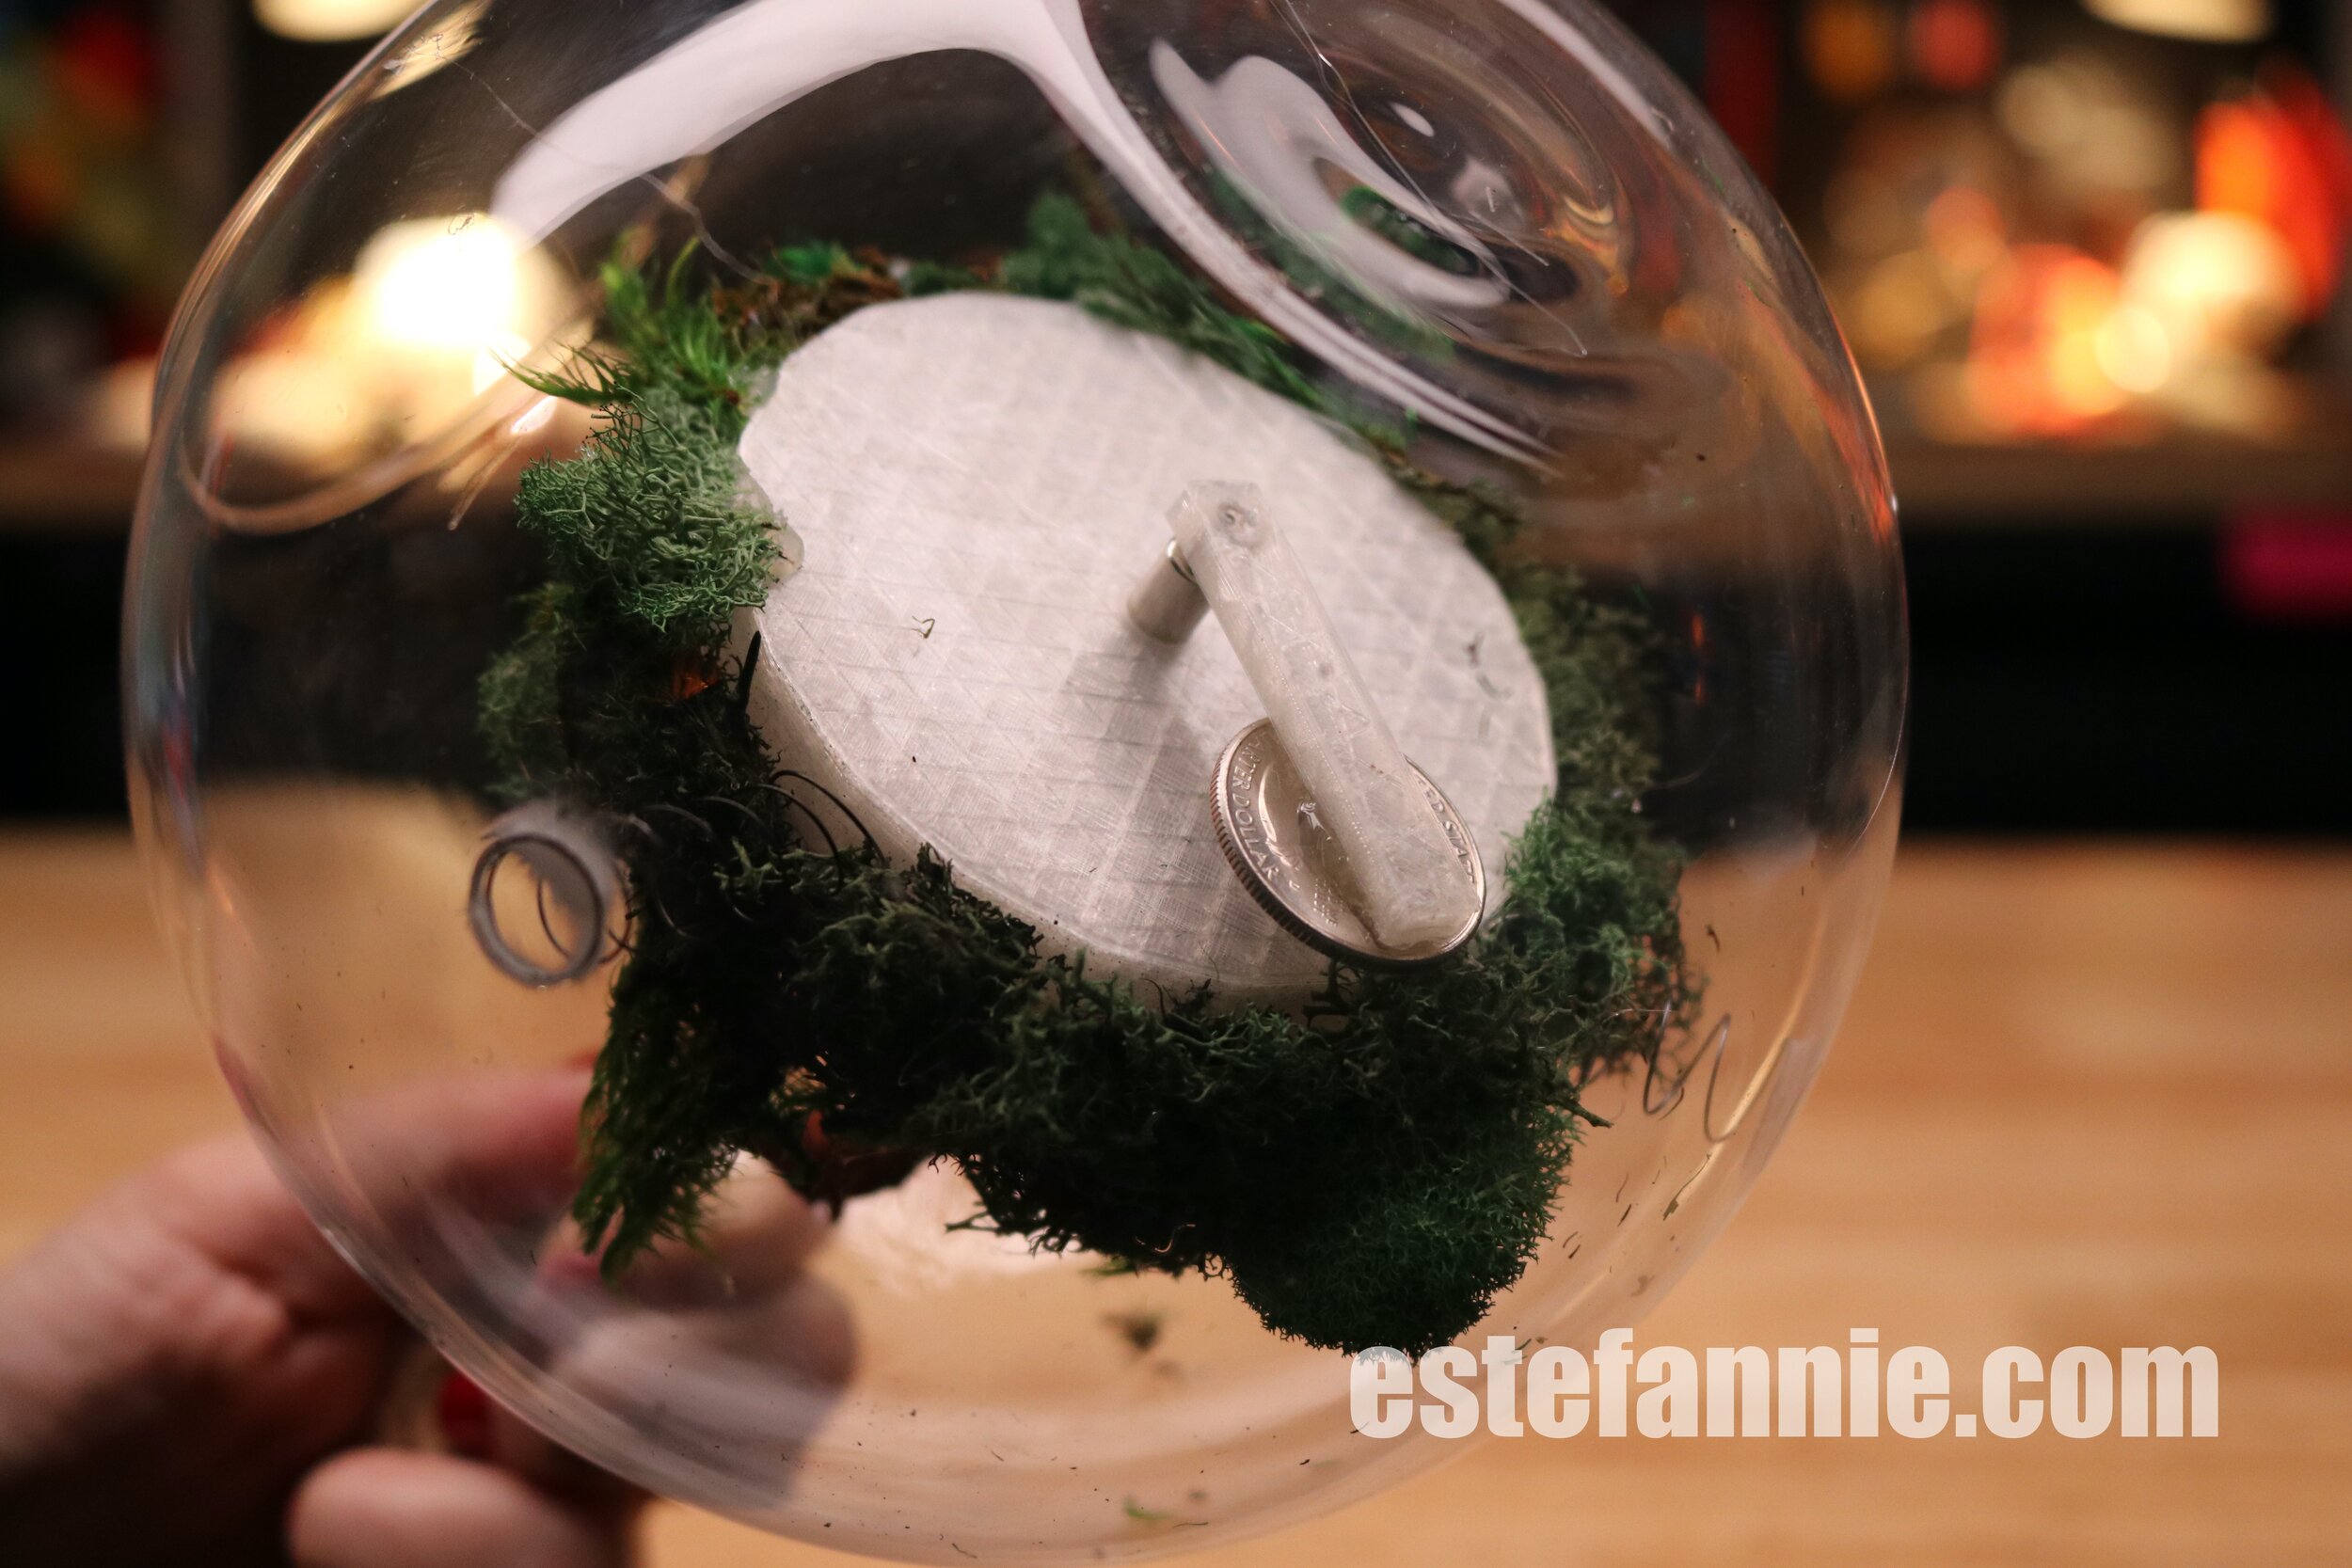
First, I designed a platform using Tinkercad. This platform would hold the battery and motor inside, and have a lid for the rest of the electronics and horse. The case has 4 holes - one for the motor that is right in the middle of the platform, and three on the sides to attach to the springs.
Then, I designed the lid for the platform. I left a hole on the side to pass over the cables to the top of the lid. Lastly, I made a pole with a hole to fit the moving side of the motor and the length was the radius of the platform. This is the pole that has a quarter (coin) glued to the other side to shift the platform’s weight and give the earthquake effect.
I 3D printed everything using clear PLA filament in my CR10-S.
*I also modeled poles (below) to hold the platform but ended up not using them (see video ;)).

The platform and the lid.

Poles for Beta platform.
I heated the motor with a soldering iron to push it through the hole in the middle of the platform, and still added a dab of glue to keep in place. I glued the other side of the motor to the pole with the coin and I was ready to test.
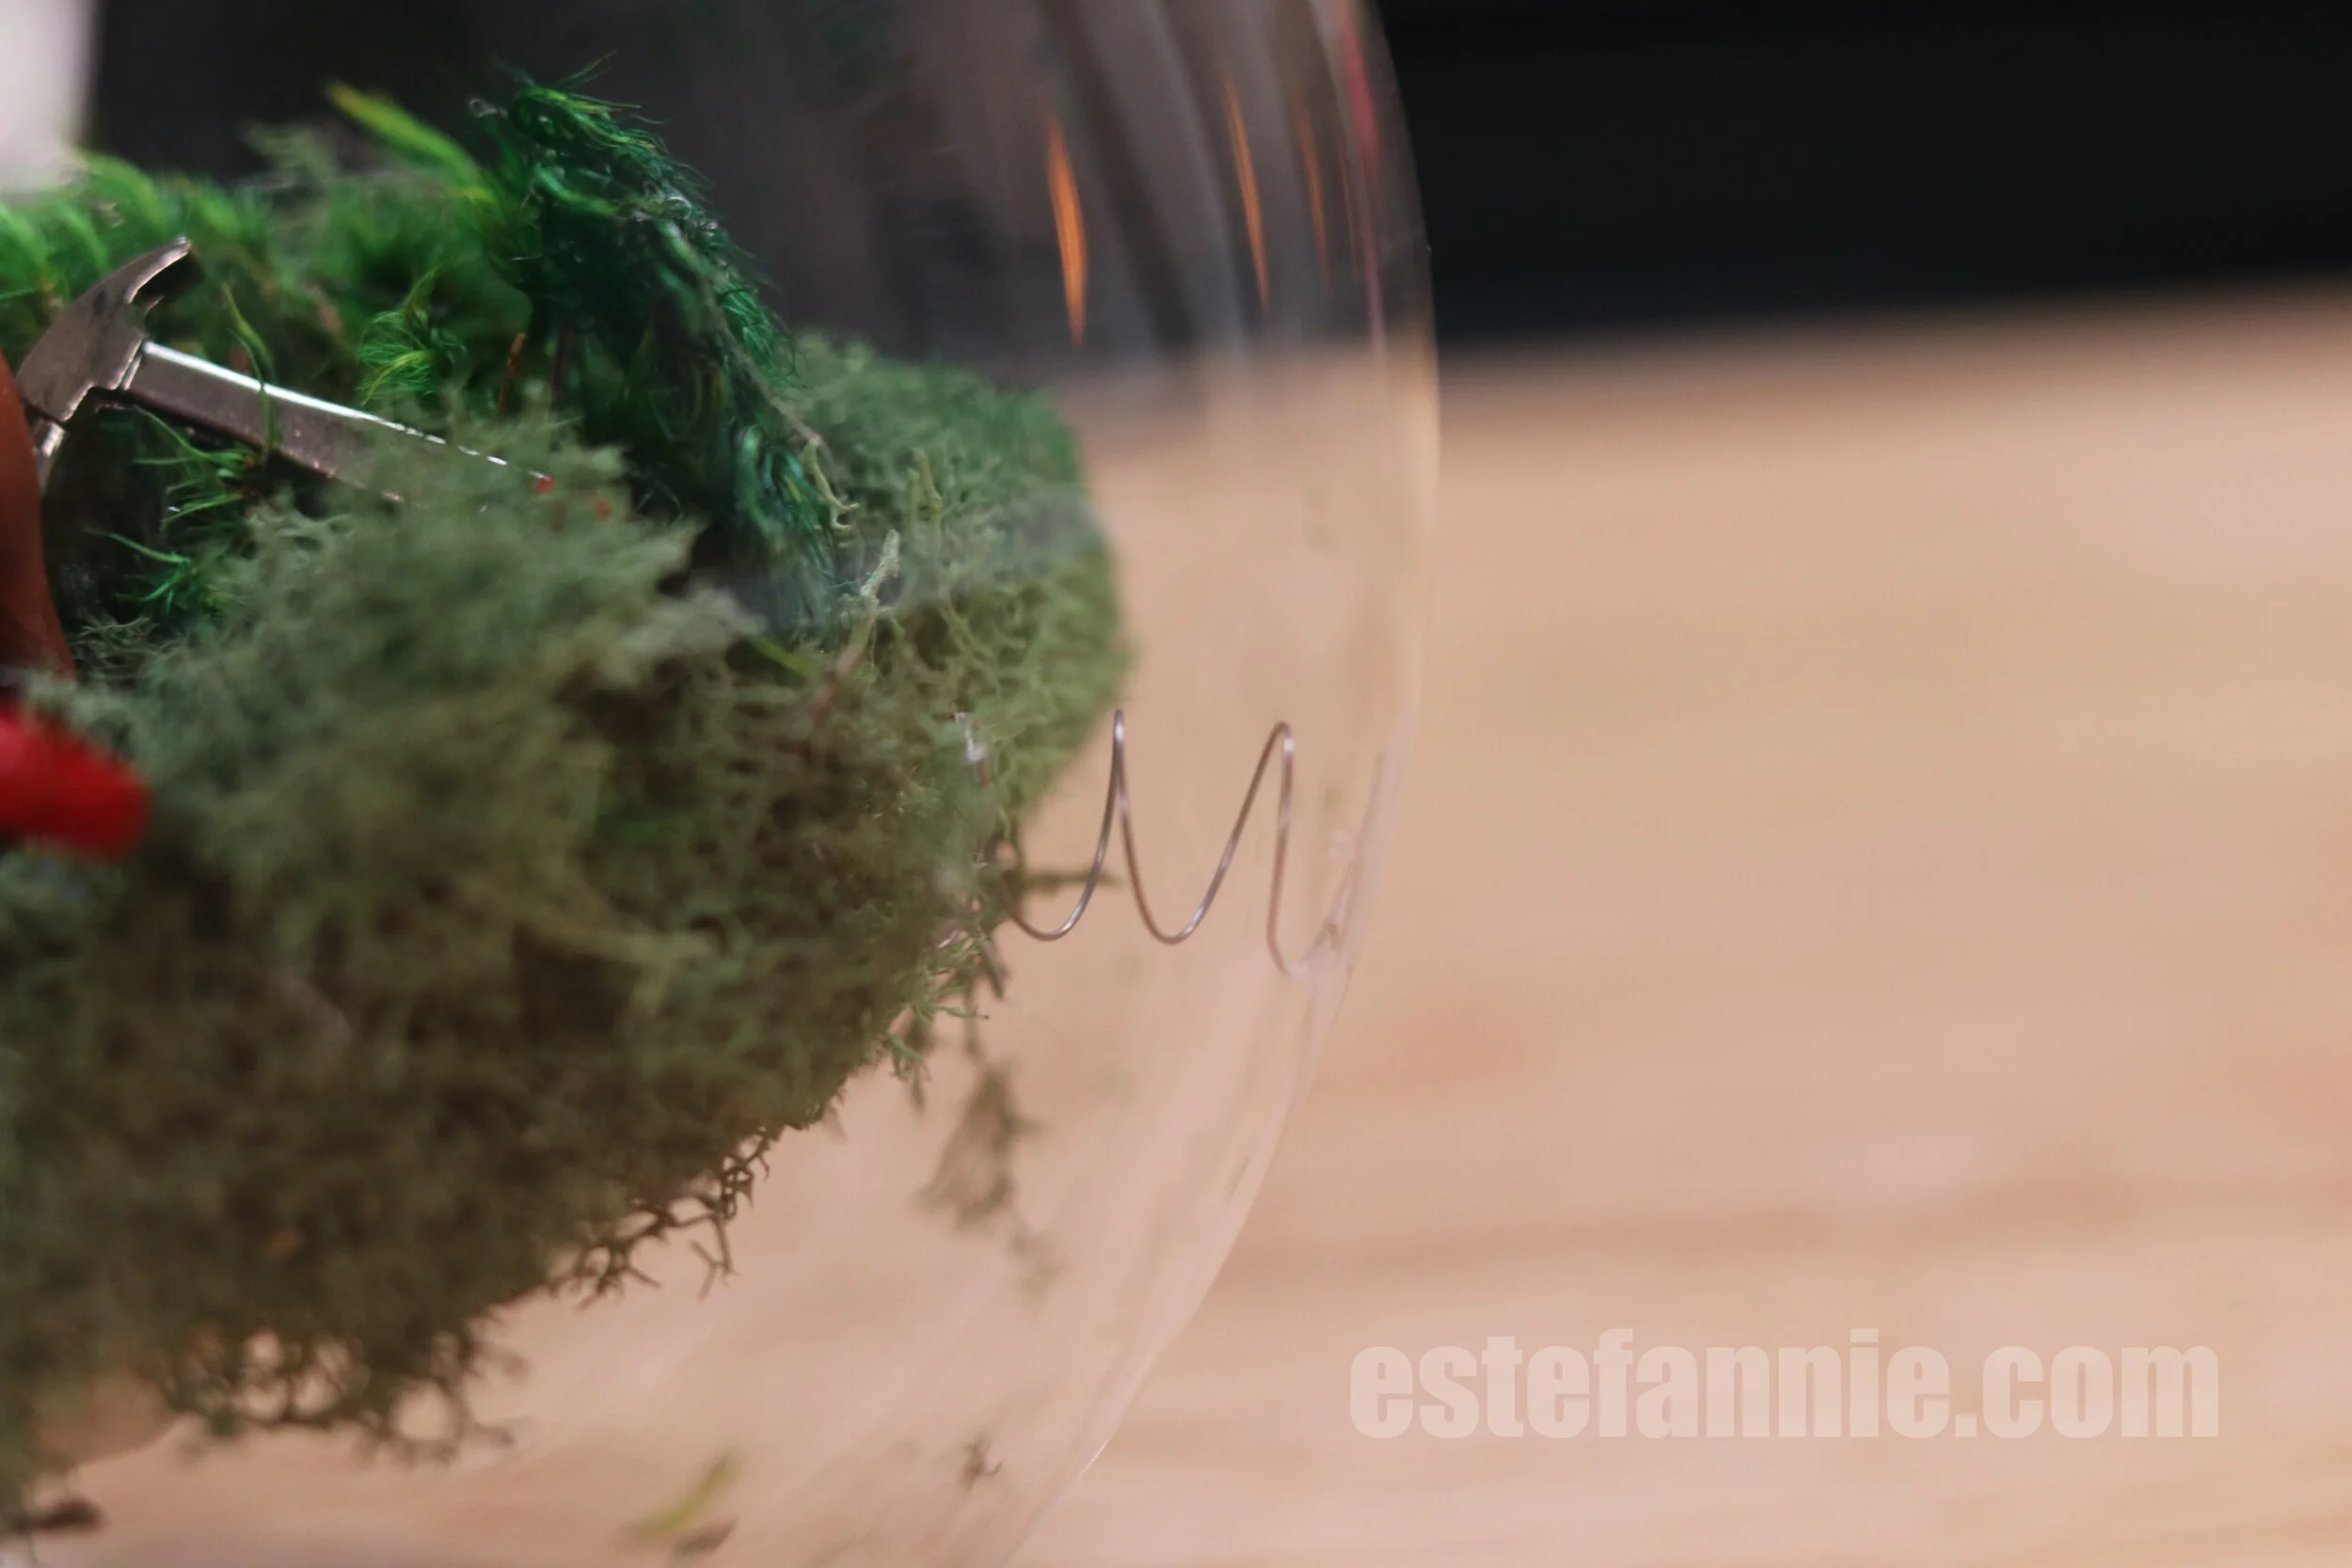
I tested a bunch of springs attached to the platform to see which would give me the effect that I was looking for. Once I got it, I glued them straight to the terrarium’s glass.
Once I had the earthquake effect, the rest was easy peazy. I just had to solder the motor and the switch to the charger board, then glue the battery inside the platform and the board and switch outside the platform and I was done!

Platform with a battery and motor inside, a charger board and switch on the platform’s lid, a pole attached to the spinning side of the motor with a coin at the bottom for counterweight, and springs attached to it and glued to the terrarium.
All I had to do was decorate with moss and the horse. The weight of the decorations made the earthquake increase in magnitude and BOOM I had an earthquake > 8 on the richter scale ;)
ok hack on byeeeeeeeeeeeeeeeee
e


P.S. Every week on Wednesdays I do a livestream on Instagram and I giveaway something during the stream. Usually the question to win the giveaway is based on one of my videos. On Jan 27th I gave away a Jetson AGX Xavier. The question was about this build. I asked: “What is the formula to calculate an earthquake’s magnitude (aka Richter scale)?” Soooo if you want to win stuff, make sure you watch my videos :P!